| ||||
|

Thursday, August 21, 2014
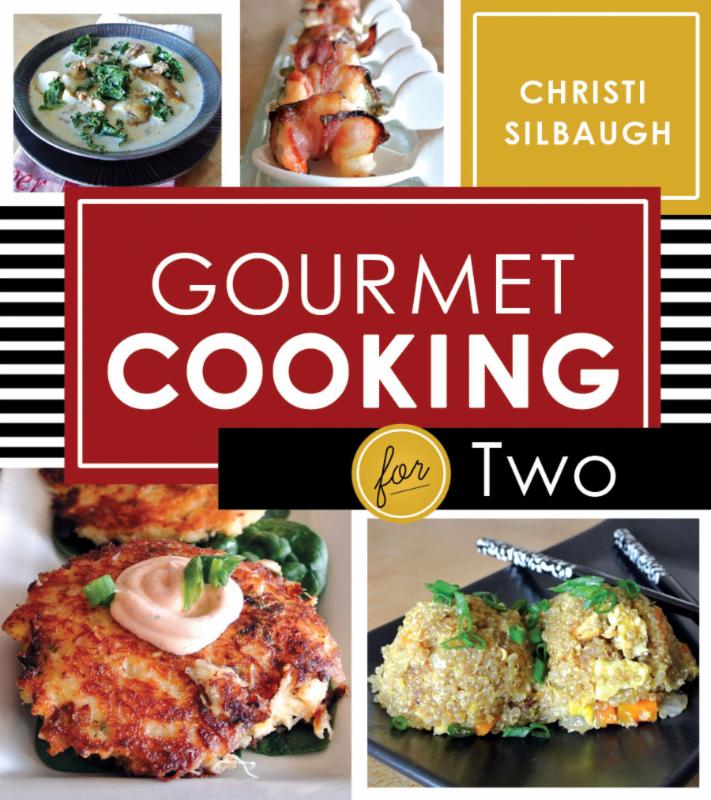
Gourmet Cooking For Two
 cookbook
Thursday, March 27, 2014
Spring Vegetable Pouches


I recently was blessed to review Eat Well and Stay Slim: The Essential Cuisine Minceur

From the million-copy bestselling author of Cuisine Minceur. Over 140 exquisite recipes fuse traditional flavors with the global influences that are redefining French cuisine, all with astonishingly low calorie counts.
This book is the mecca for healthy scrumptious recipes. Tons of mouth watering photos with easy to follow directions. I would say this is the go-to book for people who want to eat healthy, but still want foodie quality food. Get yours here: Eat Well and Stay Slim: The Essential Cuisine Minceur
So today I have adapted a recipe from the book. With some changes of course. These over-sized ravioli are scrumptious and nice and light. so great for the waistline. Enjoy!
Spring Vegetable Pouches
1/2 cup peeled and shredded carrots
1/4 cup celery
1/2 cup sweet onion, sliced
1/2 cup mushrooms, sliced
1/2 Tbsp. olive oil
1 tsp fresh tarragon, finely chopped
8 large won ton wrappers - or fresh squares of pasta dough
1 3/4 cup vegetable stock
salt and pepper to taste
fresh tomatoes and chives for garnish
Cut up your veggies.
In a medium-sized covered saucepan, gently sweat the carrots in the olive oil for 3 minutes, then add the mushrooms an sweat for 3 minutes more. Season with salt and pepper. Stir in the finely chopped tarragon and set aside.

Place 4 squares of pasta dough or large won ton wrappers.on your work surface. Place some of the cooled vegetables in the center of each pasta square.

Using a pastry brush, lightly brush the edges of each square with water. Lay another pasta square on top and then gently press the edges of the pasta squares together, making sure that there are no openings.

Add your vegetable stock to a large saucepan and bring to a boil. Add ravioli and cook one at a time for 5 minutes. Serve, topped with fresh tomatoes and chives!

Wednesday, February 26, 2014
Scallop Carpaccio Salad


Traditional Italian food is my absolute favorite food. Not the American version of Italian food, but the real Italian food that is made in Italy. Finding authentic recipes can sometimes be hard. That is why I was super excited to read The Al Tiramisu Restaurant Cookbook.


Get yours here: http://www.altiramisu.com/
In the book I found a delightful classic scallop carpaccio dish that I knew my husband would be happy to come home to. It was so easy to make. I was right, my husband loved the dish. Enjoy!

Scallop Carpaccio Salad
adapted from: The Al Tiramisu Restaurant Cookbook
serves 2
4 sea scallops
salt
1/2 Tbsp fresh squeezed orange juice
Juice of 1/2 a lemon
1/8 cup extra virgin olive oil
1 Tbsp slivered almonds, toasted
1/2 Tbsp capers
1/2 Tbsp finely chopped fresh chives
1/2 tsp fleur de sel
micro greens
Place the scallops on a baking sheet lined with wax or parchment paper. Cover with plastic wrap and place in the freezer for one hour. (I know you don't want to freeze amazing scallops, but this is only done so you can cut them super thin, do it, you won't be sorry. )
When the scallops are almost hard, remove them from the freezer, and with a sharp filleting knife, carefully cut the scallops width-wise into paper thin slices. Divide them between 2 plates.
In a medium bowl whisk together a pinch of salt, the orange juice, and the lemon juice. Slowly add the olive oil, a bit at a time, and continue to whisk until you have an emulsified vinaigrette.
Place micro greens on the plates with the scallops. top with almonds, capers, chives, and fleur de sel. Drizzle the vinaigrette over and serve.
Friday, January 24, 2014
Steak with Onion Peppercorn Sauce


I know my posts have only been about once a week right now. That is because I have been finishing my second book! I have good news! I finished the manuscript! Gourmet Cooking For Two will be coming to stores near you August of 2014. Cedar Fort publishing has picked up my contract and we are all things go! This has been quite the venture. There will be 75% new recipes and 25% of the favorites from this site. Each recipe comes with a romantic tip as well. Thank you guys for all your support!
Because I just finished my book, I thought it was time to review one. I recently had the chance to review "Great Meat".

Some people might be surprised, because I am not a meat lover, but my husband is. I was excited because having a good understanding of how to select, cut, and cook meat makes all of the difference in the final taste of a recipe, and this book gave me a chance to learn much more about meat. This book offers valuable information to meat lovers and serious home cooks who want to learn new and different preparation techniques. Learn how to identify and use different cuts, why and when free-range and grass-fed is better, the basics of home butchery, and much more with this informative book. You can get yours here: Great Meat.
I enjoyed learning about all the different cuts of meat and I really enjoyed going through all of the great recipes in this book. Here is one I adapted from the book. Enjoy!

Steak with Onion Peppercorn Sauce
adapted from Great Meat
2 8 ounce portions of tri-tip or your favorite steak cut (hangar is recommended in the book but my butcher didn't have any)
1/8 cup grapeseed oil, or any other high heat oil
1/2 onion, peeled and chopped
1 clove garlic, peeled and finely chopped
1 Tbsp pink peppercorns, coarsely cracked
1 Tbsp black peppercorns, coarsely cracked
1/4 cup red wine
1/8 cup heavy whipping cream
1/4 cup chicken stock
Gently tenderize your meat with a meat mallet and set aside. (ignore the 3rd fillet, I had to make 3 so I could get pictures).

Heat half the oil in a pan. Add the onion and garlic, and fry gently until softened. add the pink peppercorns, black pepper, and wine.

Simmer until most of the liquid has evaporated. Stir in the cream, stock, and salt to taste. Simmer until thickened, stirring occasionally.

Heat a large frying pan over medium heat. Brush the steaks with the remaining oil and season with salt. When the pan is smoking, add the steak and fry for 1 1/2 minutes on each side for medium-rare. Fry the steak in batches if they cover more than half of the pan's surface. Remove the steak and allow to rest, covered, for 3 minutes.
Add the sauce to the meat pan and stir to deglaze the juices. Stir in any juices from the rested steak. Serve the steak with the sauce on top.

Monday, January 13, 2014
Oven Baked Omelette's


There is just something magical about breakfast in bed. I think it is because everyone wants it, but not too many people want to get up and make it. Even though I am a go go go kind of person, I still love a lazy morning. I love it so much, that I want to bless my husband with it. I have a little repertoire of quick meals that look and taste divine, in no time at all. This is one of them. I get in and out of the kitchen so fast, he doesn't even realize breakfast is coming. I hop back in bed for morning snuggles, and 40 minutes later, the timer goes off and we have an amazing breakfast.
Romantic tip: Treat your love to breakfast in bed. They just might return the favor sometime!
What I love so much about these omelette's is that you can cater them to individual taste's. For instance, my husband likes all things hotter than hades. I love spice and heat, but he likes it over the top. So I added jalapeno peppers to his. You can cook the bacon and saute the onions the night before, so all you have to do is pop the omelette's in the oven.

Oven Baked Omelette's
adapted from Taste of Home
4 bacon strips, diced
1/2 onion, diced
2 green onions, sliced
4 eggs
1/2 cup milk
1/4 teaspoon salt
1-1/4 cups shredded Monterey Jack cheese, divided
Cook bacon until crisp. Drain the pan, but don't clean the pan. Set bacon aside.
In the same pan you cooked the bacon saute onion until tender; set aside.
In a large bowl, beat eggs. Add the milk, salt, 1 cup
cheese, bacon and sauteed onions. Transfer to a greased shallow
2-qt. baking dish. Or to two individual baking dish. Top with sliced green onions.

Bake, uncovered, at 350° for 30 minutes.
Take out and sprinkle with
remaining cheese. Bake another 10 minutes. Serve warm.

I like to serve these, breakfast in bed style.

If you like my work, please support it by getting my cookbook

Friday, January 10, 2014
Salted Caramel Cinnamon Rolls


Each year for Christmas I let everyone pick one treat they would like me to make for them as a Christmas present. This year my daughter told me she wanted me to make salted caramel cinnamon rolls. She never ever picks an easy thing. Not having a single recipe to refer to, I got busy creating one.
Salted caramel is easily my daughter's favorite treat. Any time I make anything she says: "oh, imagine this with salted caramel on it!". It is an epidemic. My husband hopped on her bandwagon and next week I will be sharing with you his request which happens to be salted caramel chocolate cups.
My recipe was a huge success. It is something to dream about. This recipe is perfect for holidays, birthdays, brunch, or any special occasion that you want to splurge. I would say that you will have some left to share with others, but I had trouble prying the pan out of my families hand. If you love salted caramel, get ready for your taste buds to take a trip to mecca.

Salted Caramel Cinnamon Rolls
Recipe by Christi Silbaugh
makes 12
for the dough-
3/8 cup warm water
1 1/8 teaspoons active dry yeast
1/4 cup granulated sugar
1/2 teaspoon salt
1/8 cup buttermilk, at room temperature
1 egg
1/8 cup canola or vegetable oil
2 1/2 cups all purpose flour
for the filling-
1/4 cup softened butter
1/2 cups packed light brown sugar
1 1/4 tablespoons ground cinnamon
1 tablespoon cornstarch
Salted Caramel:
1 cup unsalted butter
1 cup light brown sugar
3/4 cup light corn syrup
2 tsp sea salt
4 tbsp sugar
4 tbsp heavy cream
1 1/2 tsp vanilla extract
Sea salt flakes
In the bowl of a stand mixer fitted with a dough hook, pour in water, yeast and 1 tablespoon of the granulated sugar. Once mixture looks bubbly and frothy, pour in remaining sugar and salt.
In a small bowl, measure buttermilk, oil and egg. Whisk ingredients together until egg is incorporated to other two ingredients. Pour contents into the water and yeast mixture. Stir 20 seconds in the mixer.
Pour 2 cups of flour into mixer and stir on low until incorporated. Sprinkle flour in by 1/4 cup increments until dough cleans the sides and bottom of the bowl.
Once it has reached this stage, turn mixer on and knead for 5 minutes. Remove dough from bowl, grease and replace back into same mixing bowl. Cover with plastic wrap and a dish towel. Place in a warm place. Rise 1-2 hours or until dough has doubled in size.
In a medium size bowl, stir brown sugar, cinnamon and cornstarch together until combined. Set aside. Punch down dough. Flour a large clean table liberally with flour.
Roll dough out to be a 20x30 rectangle, while moving dough around to ensure it's not sticking to your work surface. Spread softened butter over dough, being sure to go right to the edges leaving a 1-inch strip untouched on one of the longer sides of dough.
Dump brown sugar mixture onto the middle of the dough and spread with your hands, creating an even layer over top of the butter, still leaving that 1-inch strip of dough untouched. Roll the dough up into a tight log, finishing with the plain dough on the bottom to seal the entire thing together.
Cut off the uneven ends to even out the log. Score log every 2 inches and then slice your rolls using those marks. Place into parchment paper lined, butter greased pan.

Cover pans with plastic wrap and dish towels. Let rolls rise another 1-2 hours or until they are touching and have risen almost double.
Bake in a preheated 350 degree for 17 minutes, or until tops start to brown.

Make the salted caramel. Combine the butter, brown sugar, corn syrup, salt, sugar, and heavy cream. Bring to a boil and stir for about 5-10 minutes until caramel reaches the “soft ball stage” at around 230 degrees.

Remove from heat, stir in the vanilla.
Once rolls have been removed from the oven, Pour the caramel over the rolls. It will take a minute for the caramel to sink into the rolls so they will look like drowned rolls.

Don't worry, the caramel settles and you end up with this:

Sprinkle with sea salt flakes and serve warm.

Thursday, January 2, 2014
Salted Caramel Cronuts


I think you have to be living in a hole if you have not heard of the cronut. For the few of you that don't know what it is; The Cronut™ is the unique pastry creation by Chef Dominique Ansel that many have described to be a croissant-doughnut hybrid. After its launch on May 10, 2013, Cronut™ fans spanned the world from Berlin to Singapore, making it the most virally talked about dessert item in history. You make your croissant dough, and then proceed by making them into doughnuts. The result is a flaky, buttery, mouth-watering, sweet cronut. Every day people line up around Chef Dominique Ansel's bakery block in New York to get his tasty treats. He limits each customer to only 2 cronuts a piece, and only makes 300 per day. I personally think he is crazy. He sells them for $5.00 a piece and he could make a killing if he increased production.
Well I don't live in New York. Even if I did, you would not catch me waiting in a line for hours for a treat. I am just not that person. You will however, find me in my kitchen for hours re-creating this delectable treat. They are not hard to make. You just need time. Because there is a chill time in between each fold. I suggest making the dough at least 1 day before you plan to cook them.
So here you have it. A recipe for America's 2 most popular sweet treats. A cronut combined with salted caramel. Maybe not on your new years diet plan, but you can save it for a splurge day.
I would not ever recommend just making these for 2 people. So this recipe is not a "for two" recipe. It is a share with your friends recipe. I handed them out to my building staff and to friends and family.

Salted Caramel Cronuts
Croissant-Donuts
1 1/2 cups (3 sticks) unsalted butter, softened
1 1/2 cups whole milk
1/4 cup sugar
1 tbsp active dry yeast
1 tsp pure vanilla extract
1 tsp sea salt
4 cups all-purpose flour
lots of canola oil for frying - enough to fill your pot 2" deep
3/4 cup sugar (for coating)
Salted Caramel:
1 cup unsalted butter
1 cup light brown sugar
3/4 cup light corn syrup
2 tsp sea salt
4 tbsp sugar
4 tbsp heavy cream
1 1/2 tsp vanilla extract
Sea salt flakes
With 1 1/2 cups butter, make a butter rectangle. Wrap the softened butter loosely in plastic wrap and press into the bottom of an 8”x4” loaf pan. Chill in the refrigerator for 30 minutes.
Heat your milk either on the stove top or in a microwave to 105 degrees. Add the yeast and let sit for 5 minutes or until foamy. Stir in the sugar,vanilla and salt.

Add 3 cups of the flour and combine with a large spoon until all of the flour is incorporated into a sticky dough. Then add the last 1 cup of flour and switch to your hands to knead the rest of the flour into the dough. Cover directly with plastic wrap and let chill in the refrigerator for 30 minutes.

Roll out the dough rectangle. After the dough has chilled, roll the dough on a well-floured surface into a rectangle, roughly the size of a 9”x12” baking dish. Remove the butter rectangle from the refrigerator, unwrap from the plastic and place it in the middle of the dough, perpendicular to the length.

Tuck the butter into bed. Fold the right and left dough flaps over the butter rectangle like a letter.

Transfer to a well-floured surface and roll dough back out to a 9”x12” rectangle (roughly).

Repeat the fold and roll steps 4 times. Wrap the dough in plastic and let chill in the refrigerator overnight.
After the dough has chilled for at least 8 hours, remove it from the refrigerator, roll to 1/2” thickness and cut a 3” outer ring and a 1” inner ring.

Heat the oil. Fill a large stockpot with canola oil, 2-3” deep. Place over medium heat and monitor the temperature until it reaches 375° F.
As soon as the oil reaches 375° F, use a flat spatula to carefully transfer the doughnuts into the oil. You may be able to fit 3-4 doughnuts in the pot at a time, but be careful that they are not overcrowded. Fry for about 45 seconds on each side.

Remove from oil directly into a bowl of sugar. Roll doughnut in sugar to coat the outside and let cool on wire rack.

Make the salted caramel. Combine the butter, brown sugar, corn syrup, salt, sugar, and heavy cream. Bring to a boil and stir for about 5-10 minutes until caramel reaches the “soft ball stage” at around 230 degrees.
Remove from heat, stir in the vanilla.
Dip the tops of your cronut's into the hot caramel and sprinkle with sea salt flakes.

Subscribe to:
Posts (Atom)